

Top Tips to Soundproof a Garage Conversion to a Music Room
Converting a garage or storage building into a music or leisure room is becoming more and more popular amongst home owners..
With such a good sized disused space, it’s unsurprising that home owners want to put this area to better use.
Most of us park our cars on the driveway or the street nowadays, so this has almost made the humble garage redundant.
So with some careful planning and the right materials, this once disused space can soon become one of the most treasured rooms in the home.
Whether you want to convert your garage or storage space for band practice, a gymnasium or even a home theatre, you’ll want to make sure the room is adequately soundproofed to prevent noise from disturbing the rest of the home or annoying the neighbours.
In this article, we’re going to take you through a number of top tips and industry insider tricks to soundproof your garage as best as possible.
Read on to find out more or skip to a chapter of your choice using the menu shown below.
Soundproofing for a Music Room

One of the most popular instruments for a music room is a drum kit which as you might imagine, can cause some fun and games within the house let alone for the neighbours.
For example, did you know a snare drum un-amplified can generate an incredible 89dB of noise?
To put this into perspective, a freight train at 15 meters distance creates 80dB, and we haven’t even moved on to the dB levels created by an amplified bass guitar!
So if you have these sort of levels of sound in your room, they are sure to be hitting directly into the brick wall or substrate of your garage or outbuilding and beyond, generating noise to your neighbours and indeed, in the case of an integral garage, to the rest of the household.
Creating a Room Within a Room
Without a doubt the best sound isolation outcome is by creating a cell within a cell (or a room within a room) as this creates a de-coupled structure.
This essentially means sound cannot transfer along structures of the music room walls to the external walls and beyond as they have been isolated.
However, this may not suit everyone as a cell within a cell will need a substantial self supporting frame with thicker studs, so potentially taking up more space which may be crucial to you.
With this approach there would also be a double door system to consider, ideally lined with a sound insulation material and fixed with acoustic gaskets.
Of course if there are windows as well to consider, these would be potential ‘holes in the bucket’ of your design which will leak sound and we would recommend replacing with acoustic glass to provide the best outcome.
Soundproofing the Existing Walls

If space is critical to your room conversion, then the existing walls could be treated by battening out with ‘two by two’ studs which take up less room.
With both approaches, the spaces between the studs should be packed with a cavity filler such as Stoneglass, as cavities are great regenerators and resonators of sound.
And besides, a filler is good for thermal insulation as well so you get these added benefits too.
The next to apply is a good sound insulation material which is able to tackle the levels of sound being generated, such as impact sound which can penetrate the joists and travel to the rest of the property.
Acoustiblok is an ideal material for such assemblies.
It is only three millimetres thick, with an impressive 26dB rating and within a standard wall assembly provides similar sound attenuation to a solid foot thick concrete wall.
Typically materials such as Acoustiblok are heavy (although by no means the heaviest sound insulation material out there), so a two-man approach may be required in handing the roll as well as measuring out, cutting and fitting.
Essential Preparations
Before you begin your sound insulation install, carefully note any electrical services or plumbing fixture securing points of anything that will be covered by your sound insulation material once installed.
In a garage, there’s a high chance of electrical sockets being present or even an electric car charging point that may need to be moved.
In cases where existing fixtures are present, you will need to enlist the help of a qualified electrician to move them to another suitable location.
If possible, mark their locations on the floor in chalk so that none will be missed and cut out openings (or mark them accurately on the material) immediately after each section of material is secured in place.
Fitting the Soundproofing Material

If using Acoustiblok, unroll the first few metres, and before starting, make sure to square the leading edge of the material with a framing square and cut off the excess with a razor knife.
This not only gives you an even starting point, but also ensures good straight edged runs of material and allows for tighter joints and a level installation.
Be sure to use a square when cutting Acoustiblok to length for the remainder installation runs.
Another handy tip is to roll back the cut piece in the opposite way it came off the roll to minimise curling of the material as you install it.
Ideally run the sound isolation material in parallel runs along with the line of joists for a floor scenario or to studs in a wall.
Plan the edges of your sound isolation material to meet in the middle of joists or studs with a minimum overlap of 25mm, this reduces the bulk and uplift on top of the joists and studs.
Also aim for as few fixings as possible, to prevent unnecessary puncturing of the sound isolation material.
Any sound isolation barrier should be an airtight assembly.
If air can pass through so can sound, so sealing is a critical step for a proper installation!
Essential Materials
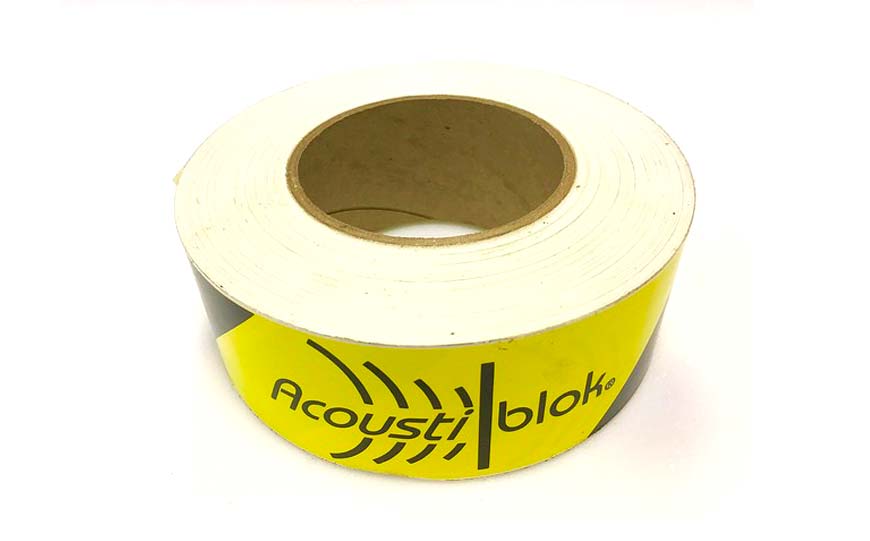
Use a sealing tape such as Acoustigrip™ Tape and a silicone such as Acoustiblok Acoustical Sound Sealant™.
These will seal all perimeter edges, joints, cut out boxes, access points and the exposed edges at window and door openings.
In addition, use a product such as Acoustiputty™ pads to seal the backs of any boxes and any through-wall penetrations.
To prevent dimples in the drywall (plasterboard) finish, keep material and fasteners as flush as possible.
Use 12.5mm or 15mm plasterboard and avoid using fasteners at locations where the sound insulation material layers overlap.
Read Our Installation Guide

For a full explanation of how to apply Acoustiblok, please refer to our installation guide and take a look at our short animated fitting guide.
Now that your room has been insulated and a plasterboard finish is in place, you may think you are ready to start jamming.
However, there is most likely to be a need for calibration.
In essence this is to treat the internal acoustics to reduce resonance or regeneration of sound which in turn improves the listening experience and addresses possible sound distortion issues to your new music room.
Have Questions?
Needless to say if you have any further queries about your plans for a music room, then give us a call on 01622 840289 where will be happy to help or alternatively, fill out our contact form.