

How to Soundproof an Apartment Like a Pro
Living in an apartment often comes with the challenge of unwanted noise.
Unlike living in a detached home, where noise is generally limited to the occupants and the immediate surroundings, apartment living means sharing walls, floors, and ceilings with neighbours.
This shared living space can result in a variety of noise-related issues, such as hearing footsteps from the apartment above, loud music or conversations from next door, or even the constant hum of traffic and street noise from outside.
These noises can be more than just a minor annoyance.
They can disrupt your sleep, concentration, and overall quality of life.
For many, the solution lies in being able to soundproof an apartment.
This article is designed to help you soundproof your apartment like a pro.
Whether you’re dealing with thin walls or noisy regenerative ceiling voids, we’ll cover the most effective methods to tackle these problems.
Table of Contents
Why Soundproof an Apartment?

Soundproofing an apartment is essential for creating a peaceful and comfortable living environment.
Reduce Noise Pollution
Living in an apartment means you’re often exposed to various sources of noise pollution, like footsteps from upstairs, loud music from next door, or traffic outside.
Soundproofing helps block out these distractions, creating a quieter and more peaceful living space.
This can significantly improve your quality of life, making your home a more relaxing place.
Increase Privacy
Soundproofing isn’t just about keeping noise out; it’s also about keeping your sounds in.
Whether you’re having a private conversation, playing music, or watching a movie, soundproofing ensures that your activities remain private.
This is especially important in apartment buildings where walls can be thin where sound can easily travel between units or even as a thick and dense structure where increased flanking transmissions leads to sound penetration.
Improve Sleep and Concentration
Noise can disrupt sleep and make it difficult to concentrate, especially if you’re working from home.
By soundproofing your apartment, you can create a quieter environment that promotes better sleep and helps you focus more effectively during work or study.
This leads to improved productivity and overall well-being.
Enhance Property Value
Investing in soundproofing can also increase the value of your apartment.
Potential buyers or renters may see a soundproofed space as a significant advantage, making your property more appealing in a competitive market.
What Types of Apartment Noise Does Soundproofing Help With?

Soundproofing helps with three different types of noise:
Airborne Noise
Airborne sound or noise refers to sounds that travel through the air, like music, conversations, or TV sounds.
When these sound waves hit a solid surface, such as a wall, they cause vibrations that pass through the structure and enter the adjacent room.
Soundproofing helps block these sound waves, reducing the amount of noise that travels between rooms or apartments.
This is especially useful in preventing disturbances from loud neighbours or external noises like traffic.
Structure-Borne Noise
Structure-borne noise occurs when sound is transmitted through the building’s structure.
This type of noise is created by an impact or vibration on a surface, such as footsteps on a floor.
The vibrations travel through the walls, floors, and ceilings, causing noise in nearby areas.
Impact Noise
Impact noise is a specific type of structure-borne noise that results from objects striking surfaces, such as dropping something on the floor or moving furniture.
This impact causes vibrations that travel through the structure and generate noise in other areas.
What are the Different Types of Soundproofing Methods?
There are 4 different types of soundproofing methods, each with its own advantages:
Deflection
Deflection involves using dense, heavy materials to block sound from passing through walls, floors, or ceilings.
By increasing the mass and density of a surface, sound waves are reflected back, reducing the amount of noise that can penetrate the structure.
Common materials include thick drywall, heavy flooring, or specialised thicker soundproofing boards.
However, while effective, these materials can also transmit some vibrations, causing sound to travel through the structure in what are commonly known as flanking transmissions.
This is a basic soundproofing technique and often used in conjunction with other methods.
Absorption
Absorption focuses on reducing sound by trapping sound waves in soft, open-cell materials.
These materials, like stone wool, mineral fibre, foam panels or insulation, work on sound absorbing principles to absorb the energy of the sound waves, reducing the overall noise level.
This method is particularly effective in treating echoes and reducing high-frequency sounds.
Absorption materials are often placed inside walls, ceilings, or floors, filling any cavities to prevent sound from bouncing around, thus reducing both passage and possible resonance and regeneration.
While effective, thicker materials are needed to absorb lower-frequency sounds.
This is a basic soundproofing technique and often used in conjunction with other methods.
Conversion
Conversion transforms sound energy into a less problematic form, such as heat.
When sound waves hit the special membrane Acoustiblok 3mm or 6mm Insulation Membrane, the material vibrates, creating friction that converts the sound energy into trace amounts of heat.
This process reduces the sound that passes through, making it an essential technique in serious soundproofing projects.
Acoustiblok 3mm or 6mm Insulation Membranes are extremely thin but provide significant acoustic benefits.
Decoupling
Decoupling separates one part of a structure from another to prevent sound vibrations from travelling through.
This method involves using studs, battens, resilient channels, or isolation clips to disconnect layers of walls, floors, or ceilings.
By reducing the physical connection between surfaces, decoupling minimises sound transmission and flanking noise.
This technique is particularly useful in preventing impact noise, like footsteps, from travelling through a building.
How to Soundproof an Apartment Wall Like a Pro
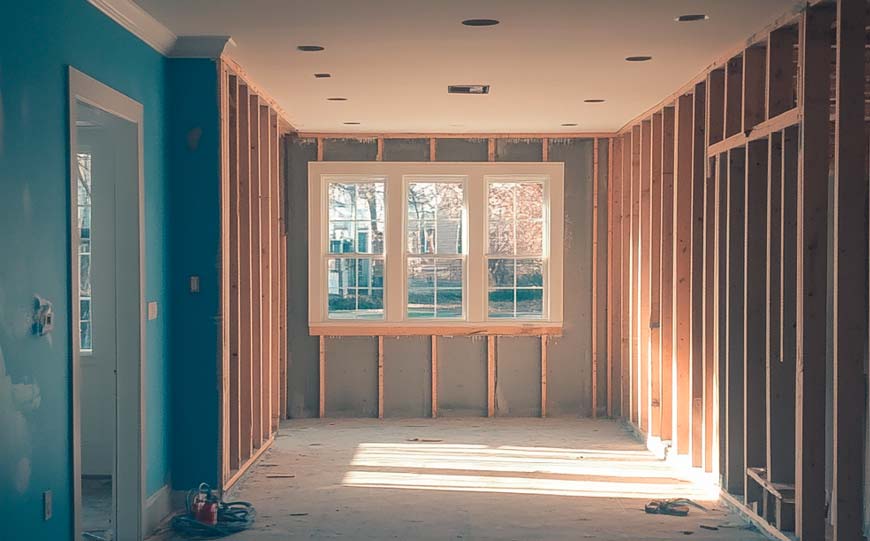
Understanding the Wall Structure
Before you start soundproofing, it’s important to understand the type of wall you’re dealing with.
If your apartment has masonry walls (made of brick, concrete, or block), you’re starting with a solid base, as these materials already provide some level of soundproofing due to their density.
However, stud walls, which are lighter and often used for interior partitions, typically allow more sound to pass through.
Knowing your wall type will help you choose the right materials and techniques.
Building a Soundproofing Frame
For effective soundproofing, you’ll need to create a frame in front of the existing wall.
This frame acts as a structure into and onto which the aforementioned principles / materials can be added to create the barrier which reduces sound transmission.
You have two options: attach the frame directly to the wall or build a freestanding structure.
If you attach it to the wall, you can use a thinner frame (around 25mm deep), as the wall itself will provide support.
If you choose a freestanding frame, it needs to be thicker and sturdy enough to support itself and attached to the floor and ceiling.
Adding Soundproofing Materials

The next step is to fill or part fill as appropriate the space between the frame and the wall with sound-absorbing material.
Open-cell insulation, such as Acoustiblok QuietFibre, stone wool or mineral fibre is ideal for this purpose.
These materials absorb sound waves, preventing them from bouncing back into the room.
After applying open cell Acoustiblok QuietFibre mineral into the cavity of the frame, apply Acoustiblok 3mm Insulation Membrane to the front of the frame.
This membrane converts sound energy into trace heat energy proving superior noise reduction and is also super thin which saves space / depth.
Saving space and maximising the gross internal area is always an advantage especially in apartments where space is invariably and typically a big concern and consideration.
Installing the Finishing Board
Once the soundproofing materials are in place, you can attach a dense finishing board of choice, such as drywall, to the frame.
For added soundproofing, you can install a second layer of drywall, staggering the seams to block more noise.
However, keep in mind that adding too many layers of the thicker finishing board can increase the wall’s thickness and reduce the usable internal space further.
Sealing Gaps and Cracks
To ensure your wall is fully soundproofed, it’s essential to pay attention to detail in the first instance.
Installation of materials should be precise, cut well and fit well into the space. Gaps should always be kept to a minimum. Seal any resulting small gaps or cracks where sound could leak through.
Use acoustic sealant around the edges of the drywall, and apply jointing tape over the seams.
For added protection, you can use Acoustic Putty Pads to seal around electrical outlets and other openings in the wall.
Final Touches
Don’t forget about doors and windows, as they can be weak points in your soundproofing efforts. The old adage: you are only as strong as your weakest point applies.
Consider adding acoustic panels, weather stripping, door sweeps, or acoustic curtains to block sound from entering through these areas.
With careful planning and the right materials, you can soundproof your apartment walls like a pro, creating a quieter, more comfortable living space.
How to Soundproof an Apartment Ceiling Like a Pro
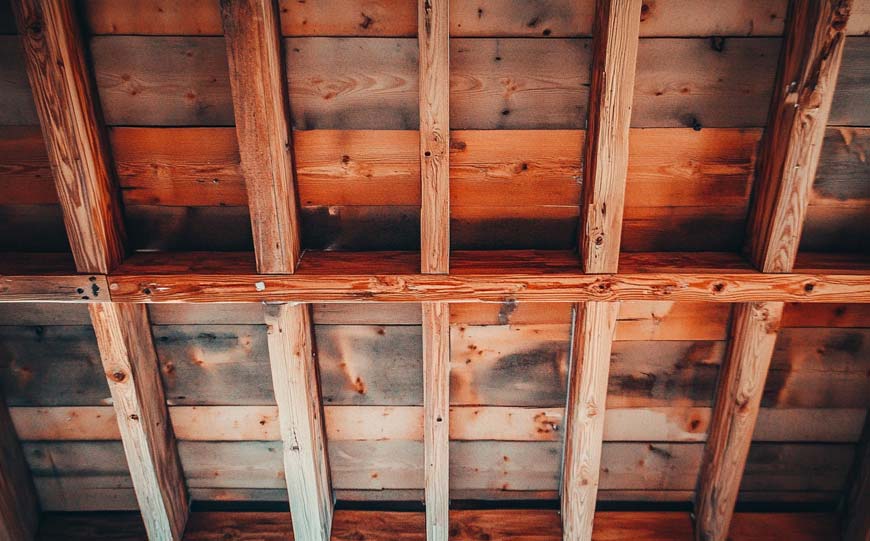
Understanding Your Ceiling Structure
When soundproofing an apartment ceiling, it’s essential to first understand the existing structure.
Most ceilings consist of timber joists or block and beam construction, creating a cavity that can be effectively used to absorb sound.
The goal is to fill / part fill this cavity, as appropriate, with sound-absorbing material and create a barrier to prevent noise from passing through.
Filling the Cavity
If your ceiling has a cavity, such as in a timber joist construction, it’s crucial to fill or part fill as appropriate this space with open-cell material like mineral wool or fibre material insulation.
This step not only absorbs sound but also prevents the cavity from acting like a drum, amplifying noise.
Filling the cavity won’t add extra depth to your ceiling, making it an efficient way to enhance soundproofing.
Installing an Isolation Membrane

After filling the cavity, the next step is to install Acoustiblok 3mm Isolation Membrane, to convert acoustic energy to further assist in mitigation and dampening.
If and where the existing ceiling board can be removed, the membrane can be attached directly to the joists.
If not, you’ll need to create a new framework beneath the existing ceiling to attach the membrane.
Similar to the vertical approach as referenced earlier but now in a horizontal plane.
This flexible layer helps to convert and dissipate sound energy, making it a crucial component in effective soundproofing.
Adding a Finishing Layer
To complete the soundproofing process, you need to add a finishing layer to the ceiling. There are two main options:
Direct Fixing
Attach a dense finishing board, like acoustic plasterboard, directly to the joists or the new framework.
This method adds mass and density and therefore a deflective principle to help block sound.
Decouple the Ceiling
For better results, install cross battens or resilient channels beneath the membrane to create a decoupling principle to the ceiling. This will also assist in holding materials in place.
This further decouples the structure creating a framework into which to attach the finishing board without penetrating directly all the way through to the joist structure further reducing the transmission of impact noise.
Mechanically anchor the finishing board to these channels / cross battens / resilient bars.
Final Touches
To maximise the effectiveness of your soundproofed ceiling, it’s essential to seal all gaps and edges.
Use acoustic sealant to fill any cracks or spaces around the perimeter of the ceiling.
Additionally, consider using Acoustiblok Acoustic Sealant / Calks, AcoustiGrip Jointing Tape, and Acoustiblok Acoustic Putty Pads to seal penetrations such as light fixtures or vents.
How to Soundproof an Apartment Floor Like a Pro

Understanding the Floor Structure
Before you begin, it’s crucial to understand your apartment’s floor structure.
Most floors consist of timber joists or block and beam construction, creating a cavity that can be effectively used to absorb sound.
The goal is to fill / part fill this cavity, as appropriate, between floor and ceiling with sound-absorbing material and create a barrier to prevent noise from passing through.
Filling the Cavity
If your floor has a cavity, such as in timber joist construction, it’s crucial to apply some element of open-cell material, mineral wool or fibre material insulation into this space.
This step not only absorbs sound but also prevents the cavity from acting like a drum, amplifying noise.
Filling the cavity won’t add extra depth to your ceiling, making it an efficient way to enhance soundproofing.
Obviously this process tends to require the subfloor to be removed to gain access to fit slab materials, although there are techniques to blow insulation under pressure into the cavity via small drill holes.
Installing a Soundproofing Membrane (Over the Joist Structure)

Where the subfloor such as floorboards, ply, T&G is removed, not only can the cavity be filled but a choice can be made at this point to apply an acoustic membrane, typically Acoustiblok 6mm Insulation Membrane over the joists and cavity fill prior to installing or reinstating the subfloor.
Most apartment floors consist of a subfloor (often made of plywood) attached to joists, with a finish layer like hardwood, tile, or carpet on top.
Sound can travel through this structure, so addressing the floor properly is essential for effective soundproofing.
Installing a Soundproofing Membrane (over the top of existing subfloor)
Installing a soundproofing membrane over the top of the subfloor is key, if not already installed, to address issues referenced above. In some cases an application over and under is specified for increased levels of acoustic mitigation.
A flexible layer of Acoustiblok 3mm or 6mm Insulation Membrane provides a super thin layer to minimise buildup whilst offering the principle of thermal conversion of the acoustic energy and dampen sound vibrations.
The membrane would preferably be installed over the top of an acoustic underlayment. However it can be installed directly on top of the subfloor where needed and tolerances dictate.
Adding a Soundproofing Underlayment
Where applying materials directly on to the top of the existing subfloor, the first step in soundproofing your floor is typically to add both an acoustic underlayment, followed by Acoustiblok 3mm or 6mm Insulation Membrane.
These materials are installed directly onto the subfloor to level between the subfloor and the finished floor to absorb sound and reduce noise transmission.
There are many types made of materials like rubber, cork, or foam and therefore they all offer differing levels of performance and effectiveness at dampening sound.
They should cover the entire floor surface, with seams tightly butted together to prevent sound leaks.
For best results, use a high-density material such as Acoustiblok AcoustiMat Acoustic Underlayment designed specifically for soundproofing and works in tandem with Acoustiblok 3mm or 6mm Insulation Membrane installed in the following principle.
Secure the underlayment followed by the membrane with adhesive or staples where needed, ensuring it’s smooth and free of wrinkles.
Be sure to tightly abutt the seams and seal them with acoustic tape to create a continuous sound barrier.
Choosing the Right Flooring Material
The type of flooring material you choose can significantly impact the effectiveness of your soundproofing efforts.
Carpets, for example, are naturally better at absorbing sound than hard surfaces like wood, engineered flooring or tile.
If possible, opt for thicker carpets or rugs with dense carpet underlay for comfort and even wear, as well as obviously reducing to some degree the levels of direct impact to the structure.
Many people in today’s world prefer hard flooring either for ease of cleaning or sanitation.
If this is your preferred floor finish, it obviously becomes even more critical to improve acoustic performance as previously explained.
It is also worth considering engineered wood or luxury vinyl planks with built-in soundproofing properties.
These materials can help reduce noise while maintaining the aesthetic you want.
Floating the Floor
Another effective technique for soundproofing is to create a floating floor.
This method involves installing the finished floor on top of a resilient layer, such as AcoustiCradles or rubber / foam pads, without directly attaching it to the subfloor.
The floating floor reduces the transmission of impact noise, like footsteps, by decoupling the subfloor and finish flooring from the structure below.
As you might imagine, these systems will greatly increase the depth of the buildup and therefore the overall level of the finish floor.
Great if there is the space to play with and where this level of isolation / mitigation is required.
This technique creates a framing system which sits on or in an isolation cradle, onto which the subfloor is then mechanically anchored and works well in conjunction with acoustic underlayment and acoustic membranes, creating a comprehensive soundproofing system.
Sealing Gaps and Edges
After installing the soundproofing layers and flooring, it’s essential to seal any gaps or edges where sound could escape.
Use flexible acoustic sealant to fill the small gaps / expansion gaps around the perimeter of the room where the floor meets the walls.
This step prevents sound from travelling through small openings and ensures the effectiveness of your soundproofing efforts.
A further application of sealant underneath the skirting board can also be really beneficial.
Final Touches
To maximise soundproofing, consider adding rugs or thick carpets to further reduce noise.
Not only will they reduce direct impact or foot fall, but also help absorb acoustic energy and reduce the potential for increased resonance and amplification of sound within the space.
By carefully selecting materials and following these steps, you can significantly minimise noise transfer through your apartment floor, creating a quieter and more comfortable living space.
What are the Drawbacks to Soundproofing?
While soundproofing can help bring several improvements to your home life such as increased privacy and better sleep, there are some downsides to consider:
Cost
One of the main drawbacks of soundproofing is the cost.
High-quality soundproofing materials and installation can be expensive.
Depending on the methods and materials used, the price can add up quickly.
For many people, the cost of soundproofing may be prohibitive, especially if they are renting or only planning to stay in the apartment for a short time.
Space Reduction
Soundproofing often requires adding additional layers of material to walls, floors, or ceilings.
This can reduce the overall living space slightly and in smaller apartments, even a few inches of lost space can make a noticeable difference, making rooms feel more cramped.
But remember there are the thinner materials and systems with higher performance levels mm for mm – Acoustiblok 3mm or 6mm Insulation Membrane
Aesthetic Impact
Soundproofing materials can sometimes impact the appearance of a room.
While some options, like acoustic panels, can be visually appealing, others might not blend in as well with the existing decor.
This could lead to a less aesthetically pleasing environment if not planned carefully.
Limited Effectiveness
Soundproofing can reduce noise, but it may not eliminate it entirely.
Some noises, particularly low-frequency sounds like heavy footsteps or bass from music, can be difficult to block completely.
This limitation means that even after investing in soundproofing, you might still experience some noise disturbances.
Complex Installation
Installing soundproofing can be complex, particularly for thicker options with multiple processes.
This often requires professional help, adding to the overall cost and time commitment.
For those unfamiliar with construction, DIY soundproofing may lead to suboptimal results, reducing the effectiveness of the effort.
Conclusion
Soundproofing an apartment like a pro involves several steps, including soundproofing walls, ceilings, and floors ideally to create the ‘cell within a cell’.
It offers many advantages, such as improved comfort, privacy, and property value.
However, it also comes with downsides like cost and some loss of gross internal area but keep an open mind to realistic results with realistic loss of space.
By carefully planning and choosing the right materials, you can create a quieter, more peaceful living space.
Whether you’re looking to block out external noise or prevent your own noise from disturbing others, soundproofing is a valuable investment in your home’s quality and your overall well-being.
Disclaimer
Acoustiblok UK Ltd / Thermablok Aerogel Ltd gives no warranty and accepts no responsibility or liability for the accuracy or the completeness of the information and materials contained in this website, blog or media content. Under no circumstances will Acoustiblok UK Ltd / Thermablok Aerogel Ltd be held responsible or liable in any way for any claims, damages, losses, expenses, costs or liabilities whatsoever (including, without limitation, any direct or indirect damages for loss of profits, business interruption or loss of information) resulting or arising directly or indirectly from your use of or inability to use this website, material, content or any website linked to it, or from your reliance on the information and material on this website, even if Acoustiblok UK Ltd / Thermablok Aerogel Ltd has been advised of the possibility of such damages in advance.